
Baby Food Recipes: A Complete Stage-by-Stage Guide
🟢 Quick Facts
•By Tiny Tummies Food
•Updated August 2026
• 13 min read
|
Age |
6–12 months |
|---|---|
|
Meal Type |
Purees, mashed foods, early finger foods |
|
Prep Time |
10–25 minutes |
|
Difficulty |
Easy |
|
Best For |
New parents starting solids, batch prep, South Asian households |
If you are looking for baby food recipes that actually work in real life — not just look nice in a photo — you are in the right place. Making homemade baby food recipes from scratch sounds complicated before you start. It is not. The first batch I ever made was a complete disaster — I steamed a sweet potato, blended it with too much water, and ended up with something closer to soup than food… My daughter took one spoonful, looked at me like I’d personally betrayed her, and turned her head away. I remember standing in the kitchen thinking, is this really something people do three times a day?
It gets easier. Not because babies suddenly become less dramatic about food — they don’t — but because you figure out the handful of recipes that actually work for your family, and you stop trying to reinvent the menu every single day. That’s really what this guide is: a stage-by-stage collection of baby food recipes, including the South Asian staples so many of us grew up on but somehow never see in the typical “first foods” list.
When to Start Baby Food
Most pediatric guidelines point to around 6 months as the general starting line for baby food recipes and solids more broadly, but the more useful marker is readiness rather than the calendar. A baby who can sit upright with decent support, has lost the reflex that automatically pushes food back out of their mouth, and shows real interest in what’s on your plate is usually ready to begin. Some babies hit this at exactly 6 months. Others take a few extra weeks. Both are fine, and neither is something to stress over.
If your baby was born early or has any feeding-related concerns, it’s worth checking in with your pediatrician before starting, since the timeline can shift depending on their individual development.
Basic Equipment You’ll Actually Need
You don’t need a drawer full of gadgets to make baby food, but a handful of tools genuinely make the process faster. A steamer basket or a simple stovetop pot for cooking fruits and vegetables until soft. A blender, food processor, or even an immersion (stick) blender for pureeing — none of these needs to be fancy or baby-specific. Silicone ice cube trays for portioning and freezing purees, ideally with a lid to prevent freezer odors from getting in. A few small storage containers or freezer bags for anything that isn’t cube-sized. A soft-tipped baby spoon, which is gentler on new gums than a regular metal one. A high chair with good back and foot support, which matters more for safe swallowing than people usually expect. That’s genuinely the whole list — anything beyond this is a nice-to-have, not a requirement.
Stage 1: First Purees (6+ Months)
The earliest stage is really about introduction more than nutrition — breast milk or formula is still doing most of the heavy lifting at this point. Single-ingredient purees, smooth and thin enough to drip off a spoon, are the easiest place to start.
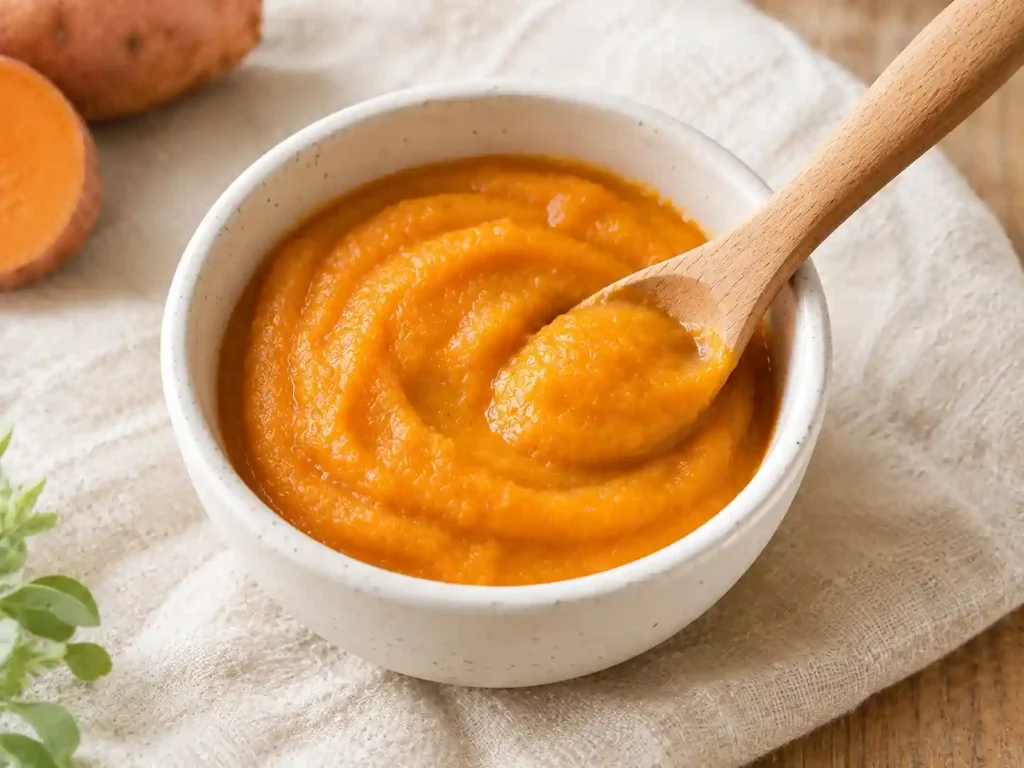
1. Sweet Potato Puree: Peel and dice one medium sweet potato, steam until very soft — about 15 minutes. Blend completely smooth with a little warm water or breastmilk until it reaches a runny, almost pourable consistency. This was my daughter’s first solid food. She ate it with an expression of complete surprise, paused for a moment, then opened her mouth for more. A genuinely good sign.
Yield: 8-10 ice cube portions. Refrigerate up to 3 days, freeze up to 3 months.
2. Courgette Puree: Steam diced courgette until very soft — about 8 minutes — blend smooth. Mild flavor, high water content, easy to digest. A good early vegetable for introducing savory flavors without the stronger taste of broccoli or spinach. Good to pair alongside sweeter purees to build savory flavor acceptance early.
Yield: 6-8 ice cube portions. Refrigerate 3 days, freeze 3 months.
3. Apple Puree: Peel, core, and dice sweet apple — gala or fuji work well. Steam until very soft, blend completely smooth. The natural sweetness makes this very well accepted by most babies. One of the most useful purees to keep in the freezer because it mixes well with vegetables babies are less enthusiastic about.
Yield: 6-8 ice cube portions. Refrigerate up to 3 days, freeze up to 3 months.
4. Banana Puree: Mash very ripe banana with a fork until completely smooth. No cooking required. The riper the banana the sweeter and smoother it becomes — overripe banana are actually ideal here. Rich in potassium and natural energy. One of the simplest easy baby food recipes that exists.
Best made fresh — does not freeze well as it discolors and changes texture.
5. Spinach Puree: Briefly wilt fresh spinach in a tiny amount of water, blend completely smooth, push through a fine mesh sieve. Very thin consistency — mix with sweet potato or carrot puree for better texture and flavor balance. Rich in iron. Best introduced as a mix-in alongside an already accepted puree rather than offered alone because of the strong flavor.
Yield: Small quantity — best used as a mix-in with other purees.
6. Pea Puree: Cook frozen peas until soft, blend completely smooth, then push through a fine mesh sieve to remove the outer skins that do not blend smooth. The sieving step is important — without it the texture is slightly grainy which many babies find unpleasant. Bright green color, naturally sweet, and a genuinely good source of plant protein and iron. One of the most nutritious Stage 1 vegetables worth introducing early.
Yield: 6-8 ice cube portions. Refrigerate 3 days, freeze 3 months.
7. Parsnip Puree: Peel and dice parsnip, steam until very soft — about 15 minutes — blend smooth with a little warm water. Naturally sweet with a mild distinctive flavor that is different from sweet potato or carrot. Rich in fiber and folate. Less commonly offered than the standard first foods which makes it particularly useful for building flavor variety from the start.
Yield: 6-8 ice cube portions. Refrigerate 3 days, freeze 3 months.
8. Mango puree: Very ripe mango blended completely smooth — no cooking required if perfectly ripe, or briefly steamed for about 5 minutes if slightly firm.
The flesh should blend effortlessly when the mango is at peak ripeness. Rich in vitamin A and vitamin C, and the tropical sweet flavor is accepted readily by most babies. A useful mix-in for improving acceptance of less sweet vegetable purees — stir a spoonful into broccoli or spinach puree and the flavor difference is remarkable. Push through a fine mesh sieve if you want a completely smooth
consistency.
Yield: 4-6 ice cube portions. Refrigerate up to 2 days — mango is best used fresh or refrigerated rather than frozen as texture changes slightly.
9. Butternut Squash Puree: Halve a small butternut squash, remove seeds, roast cut-side down at 180°C until completely soft — about 40 minutes. Scoop out the flesh and blend smooth with a little warm water. Roasting rather than steaming gives a sweeter, more concentrated flavor that most babies find very appealing. One of the easiest Stage 1 recipes because the oven does all the work.
Yield: 10-12 ice cube portions. Refrigerate 3 days, freeze 3 months.
10. Carrot Puree: Peel and dice carrots, steam until completely soft — about 12 minutes — blend smooth with a little warm water. Slightly more watery than sweet potato naturally, so add less liquid when blending. Rich in beta-carotene. Most babies accept carrot puree readily because of the mild sweet flavor.
Yield: 6-8 ice cube portions. Refrigerate up to 3 days, freeze up to 3 months.
11. Oat Porridge Puree: Cook rolled oats in whole milk or water until very soft and creamy — much softer than you would make it for yourself. Blend briefly if needed for a completely smooth consistency for younger babies or leave slightly textured for babies approaching Stage 2. Add a small amount of mashed banana for natural sweetness.
The pattern across all of these is the same: cook until soft, blend until smooth, thin until it’s closer to yogurt than mashed potato. As your baby gets more comfortable swallowing, you can gradually thicken things up.
Stage 2: Thicker Textures & Combinations (7–9 Months)
Once your baby has a few weeks of single-ingredient purees under their belt, it’s time to introduce texture and start combining flavors. This is also where you can begin layering in protein.
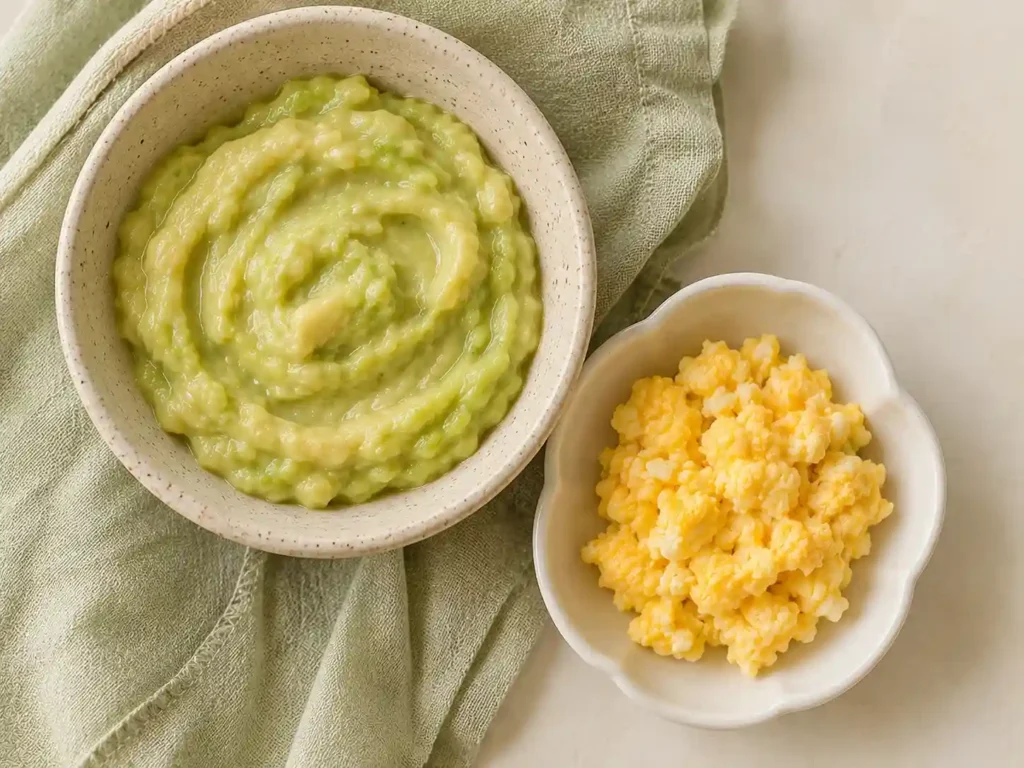
1. Simple mashed lentils: Cook lentils soft and blend with a little water — essentially a very basic dal, and a good early introduction to the flavor your baby will meet again and again in South Asian cooking.
2. Chicken and Sweet Potato Puree: Cook a small piece of chicken breast completely through — no pink remaining anywhere — then blend with steamed sweet potato and a little warm unsalted water or homemade broth until completely smooth. The sweetness of the potato balances the more complex flavor of the chicken. A recipe worth returning to repeatedly through Stage 2 as it introduces protein in a familiar, well-accepted base. Introduce chicken alone first before combining.
Yield: 6-8 ice cube portions. Refrigerate 1-2 days only, freeze up to 1 month.
3. Avocado and banana mash: Two soft fruits mashed together make a creamy, easy-to-swallow combination with healthy fat built in.
4. Salmon and Sweet Potato Puree: Bake a small piece of salmon at 180°C for 12 minutes, check extremely carefully for any bones — removing every single one — then blend with steamed sweet potato and a little warm water until smooth. Omega-3 fatty acids from the salmon support brain development significantly at this stage. Fish is a common allergen — introduce it alone first and watch carefully for any reaction before serving again.
Yield: 4-6 ice cube portions. Refrigerate 1 day only, freeze up to 1 month.
5. Iron-rich vegetable and protein blend: Pureed chicken or lentils blended into a thin vegetable puree adds meaningful iron at a stage when it matters most.
6. Pear and Blueberry Puree: Steam slightly underripe pear until completely soft, add very ripe fresh or frozen blueberries, blend smooth, push through a fine mesh sieve. Rich in antioxidants, naturally sweet, and a beautiful deep purple-pink color that tends to attract attention from babies who are becoming more visually aware of their food.
Yield: 4-6 ice cube portions. Refrigerate 2 days, freeze 3 months.
7. Mashed scrambled egg: Soft scrambled egg, mashed with a fork, introduces a new texture and a strong protein source.
8. Broccoli and Pea Puree: Steam broccoli florets and peas until both are very soft, blend completely smooth, push through a fine mesh sieve. Rich in iron and vitamin C — a good combination because the vitamin C in the peas improves absorption of the iron in the broccoli. Mix with a little apple or sweet potato puree if your baby seems reluctant about the flavor.
Yield: 6-8 ice cube portions. Refrigerate 3 days, freeze 3 months.
9. Yogurt with fruit puree: Plain, full-fat yogurt mixed with fruit puree adds a new texture without requiring any extra cooking.
10. Apple and Spinach Puree: Cook apple until soft, blend with briefly wilted spinach. The apple sweetness almost completely masks the spinach flavor, making this one of the most effective ways to introduce iron-rich leafy greens early. Most babies accept this surprisingly readily because the apple flavor dominates entirely.
Yield: 6-8 ice cube portions. Refrigerate 2 days, freeze 3 months.
This is usually the stage where parents start feeling a bit more confident, mostly because the “will this make my baby choke” anxiety starts to ease once you’ve gotten a few weeks of successful meals under your belt.
Allergen Introduction Guide
Current evidence suggests introducing common allergens early — rather than avoiding them — actually reduces the risk of allergy developing. The current guidance from major pediatric organizations is to introduce allergens from around six months, one at a time, with two to three days between each new allergen to monitor for reactions.
If your family has a history of food allergies or eczema, speak to your pediatrician before introducing allergens — timing and approach may be different for higher-risk babies.
Common Allergens and How to Introduce Them:
|
Allergen |
How to Introduce for Babies |
What to Watch For |
|---|---|---|
|
Egg |
Well-cooked scrambled egg mashed smooth, or hard boiled egg mashed into puree |
Rash, swelling around mouth, vomiting, hives |
|
Peanut |
Smooth peanut butter thinned with warm water or breastmilk to a runny consistency — never whole nuts |
Rash, hives, swelling, difficulty breathing |
|
Tree nuts |
Almond or cashew butter thinned with water — never whole nuts or chunks |
Rash, hives, swelling, vomiting |
|
Fish |
Well-cooked white fish blended into vegetable puree — check for bones |
Rash, swelling, vomiting, digestive upset |
|
Shellfish |
Well-cooked prawn blended into puree |
Rash, hives, swelling, vomiting |
|
Wheat |
Soft well-cooked pasta or bread mixed into puree |
Digestive upset, rash, bloating |
|
Dairy |
Plain full-fat yogurt or mild soft cheese |
Rash, digestive upset, vomiting |
|
Soy |
Plain tofu blended smooth into vegetable puree |
Digestive upset, rash |
|
Sesame |
Tahini thinned with water — tiny amount |
Rash, swelling, vomiting |
Important: Signs of a mild allergic reaction typically appear within minutes to two hours of eating. Signs of a severe reaction — difficulty breathing, severe swelling of the face or throat, sudden paleness — require immediate emergency medical care. Call emergency services immediately if you observe these symptoms.
Introduce each allergen at home, not at daycare, so you can monitor your baby directly. Do not introduce more than one new allergen on the same day.
Portion Guide by Age
One of the most common sources of mealtime stress for new parents is not knowing how much their baby should be eating. The honest answer is: less than you probably think, and it varies enormously from baby to baby and day to day.
Use this as a general guide, not a target to hit at every meal. Following your baby’s hunger and fullness cues — offering more when they want it, stopping when they show signs of being full — is always more reliable than trying to get them to finish a specific amount.
|
Age |
Milk Feeds |
Solid Meals Per Day |
Texture |
Approx Portion Per Meal |
|---|---|---|---|---|
|
6 months |
4-6 per day |
1-2 small |
Very smooth, thin puree |
1-2 teaspoons, building slowly |
|
7 months |
3-5 per day |
2-3 |
Smooth, slightly thicker |
2-4 tablespoons |
|
8 months |
3-4 per day |
3 |
Mashed, some soft lumps |
4-6 tablespoons |
|
9-10 months |
3-4 per day |
3 + 1 snack |
Soft lumps + finger foods |
6-8 tablespoons |
|
11-12 months |
3 per day |
3 + 2 snacks |
Soft family food |
Small family portions |
Signs your baby is full:
- Turning head away from the spoon
- Keeping mouth firmly closed
- Pushing the bowl or spoon away
- Losing interest and becoming distracted
- Spitting food back out repeatedly
Signs your baby wants more:
- Opening mouth when they see the spoon coming
- Leaning forward toward the food
- Reaching for the spoon or bowl
- Crying or fussing when you pause between spoonfuls
Stage 3: Finger Foods & Family Meals (9–12 Months)
By nine months or so, many babies are ready to move toward self-feeding — and honestly, this is where things get a lot more efficient for you as a parent.
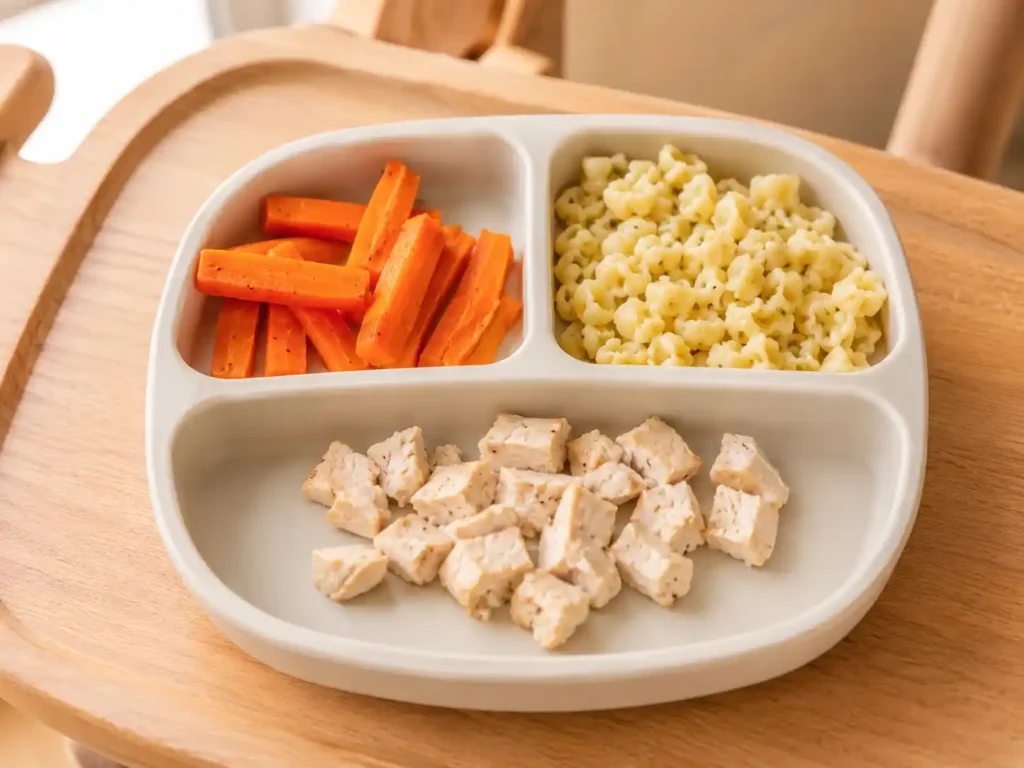
1. Soft roasted vegetable sticks: Carrot, sweet potato, or zucchini, roasted until soft enough to mash between two fingers, cut into graspable strips.
2. Mini Egg Muffins: Whisk two eggs with a tablespoon of finely chopped soft vegetables — spinach, grated carrot, or peas all work well — and a small amount of grated mild cheese. Pour into a greased mini muffin tin and bake at 180°C for 12 minutes until just set. Cool before serving. High in protein and iron, easy for small hands to hold, and something you can batch cook on a Sunday and refrigerate for the whole week. One of those recipes that sounds more effort than it actually is.
Refrigerate up to 3 days.
3. Small well-cooked pasta: Soft pasta shapes, plain or with a mild sauce, work well for early self-feeding practice.
4. Soft Steamed Broccoli Florets: Steam broccoli florets until completely soft — soft enough to squish easily between your fingers, which is the test that matters. The small tree shape is genuinely popular with many babies who like holding the stem and gnawing at the top. Rich in iron and vitamin C. If your baby seems reluctant, try dipping the tip in a tiny amount of mild cheese sauce or hummus — the contrast in flavor often helps with initial acceptance.
Best served fresh. Can refrigerate up to 2 days.
5. Tiny meatballs: Soft, well-cooked, and cut small, these introduce more texture while still being easy to gum and swallow.
6. Mashed roti pieces: Torn into small pieces, mashed roti is a natural bridge toward family meals in South Asian households.
7. Rice Balls: Cook soft white or brown rice until very soft — softer than you would make it for yourself. Shape into small balls using slightly wet hands, with a tiny amount of olive oil or ghee mixed in to help them hold together. The compact round shape is easy for babies to pick up and the familiar mild flavor means these are usually accepted without resistance even on difficult eating days. Tuck a small piece of soft cooked vegetable or a tiny bit of dal inside for extra nutrition.
Best made fresh. Refrigerate up to 1 day.
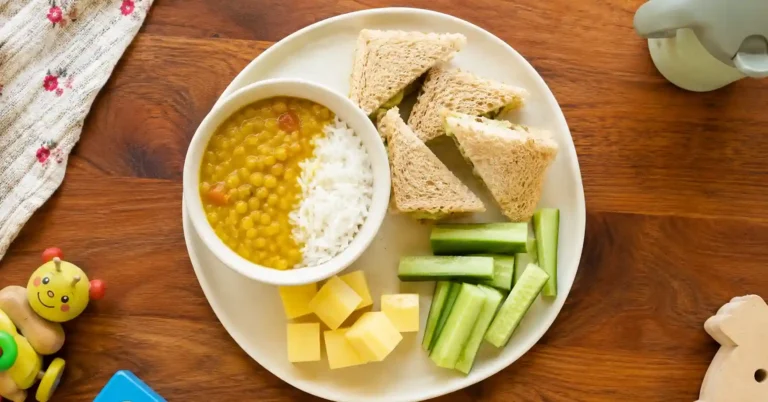
8. Rice mixed with dal: Mashed slightly for easier eating, this is often one of the first “real meals” babies eat that closely resembles what the rest of the family is having for dinner.
9. Banana Oat Pancake Pieces: Mash one ripe banana, mix with one egg and two tablespoons of oat flour, cook small pancakes in a little butter over low heat until set. Cool completely before cutting into small pieces. Soft enough to gum easily, naturally sweet, and something most babies find immediately appealing. These also freeze beautifully — make a double batch and reheat from frozen throughout the week. One of the most practical Stage 3 finger foods because it doubles as toddler breakfast well into the second year.
Refrigerate up to 3 days. Freeze up to 1 month.
South Asian Baby Food Recipes
This is the section I wish had existed when I started making baby food, because so much of what we grew up eating turns out to be genuinely excellent first food — soft, mild, easy to digest, and already part of most South Asian kitchens.
Dal for babies: Cook yellow moong dal or masoor dal until very soft, then blend or mash with a small amount of ghee. Skip the tempering with chili and heavy spices for babies under a year — a little turmeric and cumin is plenty of flavor at this stage. For a full recipe and age-by-age breakdown, see our dal recipe for toddlers guide.
Khichdi for babies: Cook rice and moong dal together with a little turmeric until soft and slightly mushy, then mash or blend depending on your baby’s stage. A small spoon of ghee stirred in at the end adds both flavor and healthy fat. Our khichdi for babies guide covers the full recipe.
Mashed roti with ghee and dal: Tear soft roti into small pieces, mix with a spoonful of dal or a mashed vegetable, and moisten slightly with ghee or a little warm water so it’s easy to swallow.
Paneer: Soft, mild, and a solid protein and calcium source. Crumbled or mashed paneer mixed into khichdi, or simply mashed with a little ghee, is an easy addition once your baby is past the very first stage of purees.
Vegetable and dal khichdi: Adds finely diced, well-cooked vegetables like carrot, pumpkin, or spinach to the base khichdi recipe for a more complete one-bowl meal as your baby moves into the 8–10 month range.
None of these need to be bland forever. As your baby approaches their first birthday and beyond, you can start introducing mild spices — a little garlic, ginger, or cumin — gradually, watching for any reaction, and building toward the flavors the rest of your family actually eats.
How to Store and Freeze Homemade Baby Food
Batch cooking and freezing is the single biggest time-saver in homemade baby food. Making a large quantity of purees on a weekend morning and freezing in ice cube trays means weekday feeding takes minutes rather than preparation from scratch every time.
Freezing Method: Spoon cooled puree into ice cube trays, cover with cling film, and freeze until solid — usually about 3-4 hours. Once frozen, transfer the cubes into a labelled zip-lock freezer bag. Label with the food name and date. Defrost overnight in the fridge or place the cube in a small bowl and sit it in warm water for about 15 minutes. Always reheat until piping hot all the way through, then cool to a safe temperature before serving.
Storage Times:
|
Food Type |
Fridge |
Freezer |
|---|---|---|
|
Vegetable purees (sweet potato, carrot, pea, squash) |
3 days |
3 months |
|
Fruit purees (apple, pear, mango) |
2-3 days |
3 months |
|
Meat purees (chicken, beef) |
1-2 days |
1 month |
|
Fish purees (salmon, white fish) |
1 day only |
1 month |
|
Dal and khichdi |
3 days |
3 months |
|
Combination purees with meat |
1-2 days |
1 month |
|
Egg-based foods |
1-2 days |
Not recommended |
|
Yogurt-based mixtures |
1-2 days |
Not recommended |
|
Banana and avocado |
Same day only |
Not recommended |
Important Storage Rules:
- Never refreeze food that has already been frozen and thawed
- Never put warm food directly into the fridge or freezer — cool to room temperature first
- Always use a clean spoon when serving — do not double-dip into stored food as saliva introduces bacteria
- Discard any leftover food that has been in contact with your baby’s spoon
- When reheating, stir well and test the temperature before serving — hot spots can form even when the surface feels cool
Getting the Salt, Sugar, and Honey Rules Right
A few rules are worth knowing cold, because they come up constantly. No added salt before 12 months — a baby’s kidneys aren’t developed enough to process it well, and this includes indirect salt from store-bought stocks or ready-made spice mixes, not just the salt shaker. No added sugar before 12 months either, partly for the same reason and partly because early sugar exposure tends to shape preferences later on. And no honey before 12 months, full stop — this one isn’t about taste or nutrition but about the risk of infant botulism, a genuine medical concern.
Everything else — garlic, ginger, mild spices, herbs — is generally fine to introduce gradually, and honestly, this is one of the nice advantages of South Asian home cooking. A lot of “baby food” recipe blogs online default to bland, Western flavor profiles by default, when in reality dal, khichdi, and mild curries have been feeding babies safely for a very long time.
When Your Baby Won’t Eat Any of It
At some point, probably sooner than you’d like, your baby is going to reject a meal you spent real time preparing. It happens to every single parent, and it happens more than once.
Feeding researcher Ellyn Satter has a framework that’s genuinely useful here, often called the division of responsibility in feeding: the parent decides what food is offered, when, and where, while the child decides whether to eat it, and how much. It sounds almost too simple, but it takes a surprising amount of pressure off both sides of the table once you actually internalize it. Your job stops at putting a reasonable, balanced meal in front of your baby. What happens after that is genuinely not something you can control, and trying to force it usually backfires anyway.
Some days your baby will eat everything on the tray and look at you for more. Other days, the exact same meal will get thrown on the floor with what feels like personal disgust. Both count. Both are fine. The pattern over a week matters far more than any single meal, and most babies are better at regulating their own appetite than we tend to give them credit for.
Frequently Asked Questions
One Last Thing
Making baby food at home can feel overwhelming in the first week and almost automatic by the third month, once you’ve settled into a small rotation of recipes that actually work for your baby. You don’t need a separate “baby menu” either — dal, khichdi, mashed roti with ghee, and soft paneer are proof that some of the best baby food recipes were already sitting in your kitchen, long before any app or feeding chart told you what to cook.
Start simple, lean on batch cooking and the freezer when life gets busy, and don’t take it personally when a meal you were proud of ends up on the floor. Somewhere between the smooth first purees and the day your baby is eating off your plate, feeding stops being a project and just becomes part of the day — which, honestly, is the whole point.
This article is for general informational purposes only and does not replace advice from your child’s pediatrician or a registered dietitian. If you have any concerns about your baby’s nutrition, growth, or feeding, please speak to a qualified healthcare professional.
Sources: American Academy of Pediatrics | World Health Organization